— RECIPE —
Bread dough for a 1-KG loaf
(750 g of dough)
INGREDIENTS Wheat flour, 550 gr
Starter dough, 200 g
Cold water, 340 ml
Salt, 15 g
EQUIPMENT Metal or ceramic bowl
Dough kneader (or your hands)
Cotton cloth
Proofing basket with textile lining

Step 1: Mixture
In a bowl mix together the ingredients: start by dissolving the starter dough and salt in the cold water and then slowly add the flour until it forms an even mixture.

Step 2: Kneading
The mixture can now be kneaded.
BY HAND: Knead the mixture for a minute at a time and repeat three or four times, letting it stand for 10 to 15 minutes in between.
WITH A KNEADER: Knead the mixture for five minutes at a time and repeat four times, letting it stand for five minutes in between. When the dough no longer sticks to the sides of the bowl, it is ready.

Step 3: First rest
Once the dough is ready, put it on a tray and cover it with a cotton or linen cloth (natural fibres) and leave it to rest for 20 minutes.

Step 4: Stretch and fold
Once it has rested, grab one end of the dough and stretch it upwards and then over to the other side of the dough. Repeat two or three times with 15- to 20-minute gaps in between. Folding allows air to get inside the dough. When baked, the resulting air pockets form holes, or an open crumb, which is a sign of high-quality bread.
Step 5: second rest for fermentation
Next leave the dough to rest covered once again by a cloth for around 20 minutes. During this time the dough undergoes a process of fermentation.

Step 6: shaping the bread
Sprinkle your work surface with flour and start by forming the dough into a round shape. Then pull the two sides away from each other before bringing them back to the centre. Immediately turn the dough over and form it into a ball shape. Apply pressure to the shaped round, pressing against your work surface to build tension into the dough.

Step 7: fermentation in the fridge
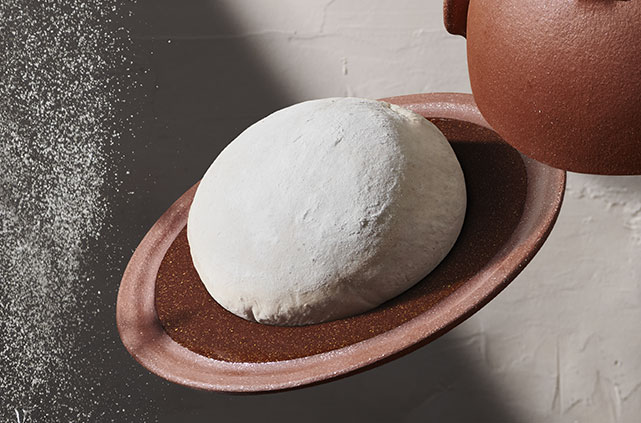
Sprinkle flour onto the textile lining (a clean kitchen cloth made from natural fibres will do) of a bowl or proofing basket and place the shaped round inside it face-down. For high-quality bread, leave the dough to ferment slowly in the fridge for 24 hours.
— RECIPE —
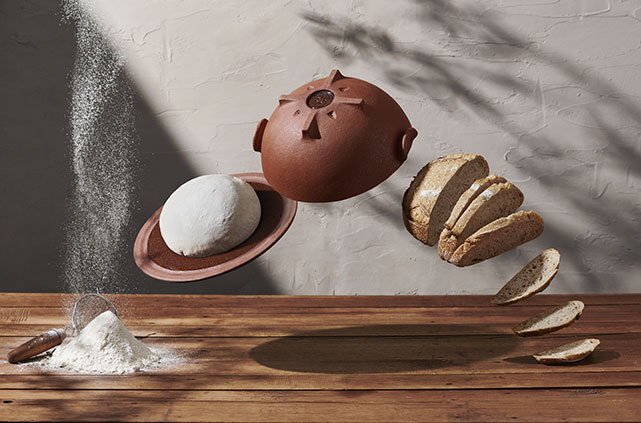
Baking a crusty loaf
WITH THE CLAUDIUS CERAMIC OVEN

Step 1: pre-heating the claudius
Place your clean Claudius ceramic oven, with the lid on, in the oven on the lower rack: approximately 3 cm from the bottom.
Heat the oven to 250 °C then remove the Claudius oven (always wear oven mitts or heat-resistant gloves).

Step 2: placing the dough in the hot claudius
Place the pre-prepared, fermented round in the middle of the base plate of your Claudius.
Score the dough with a blade, a bread lame or something similar. We recommend drawing a square on the top of the dough.

Step 3: baking the dough in the hot claudius
While wearing gloves, place the lid on your Claudius base plate and put it back in the oven on a rack: approximately 3 cm from the bottom.
After 10 minutes, without having opened the oven door at any point, lower the temperature to 200 °C and bake the dough for 45 to 50 minutes*.

Step 4: enjoy your bread baked the traditional way
After 45 to 50 minutes have passed, remove the Claudius from the oven and open it carefully (always wear oven mitts or heat-resistant gloves and keep your face away from the steam to avoid hurting yourself).
And that’s it! You can now enjoy your perfectly-baked crusty bread with all its aroma.
*Note: Temperatures and cooking times may vary depending on the oven.

— RECIPE —
Baking a soft crust loaf (steamed bread)
WITH THE CLAUDIUS CERAMIC OVEN

Step 1: pre-heating the claudius
Place the base plate (without the lid on) of your clean Claudius ceramic oven inside the oven on the lower rack: approximately 3 cm from the bottom. Heat the oven to 250 °C then remove the base plate of the Claudius (always wear oven mitts or heat-resistant gloves).

Step 2: soaking the lid in water
While the base plate is warming up, soak the lid of your Claudius ceramic oven in water by placing it under a running tap for 15 to 20 seconds, ensuring that it is completely saturated with water.

Step 3: placing the dough in the hot claudius
Place the pre-prepared, fermented round in the middle of the base plate of your Claudius.
Score the dough with a blade, a bread lame or something similar. We recommend drawing a square on the top of the dough.

Step 4: baking the dough in the hot claudius
While wearing gloves, place the lid on your Claudius base plate and put it back in the oven on a rack: approximately 3 cm from the bottom. Ensure you DO NOT get your oven gloves or mitts wet while doing this, as when you pick up the hot plate at a later stage the moisture will act as a heat conductor and you may hurt yourself.
After 10 minutes, without having opened the oven door at any point, lower the temperature to 200 °C and bake the dough for 50 minutes*.

Step 5: enjoy your bread baked the traditional way
After 50 minutes have passed, remove the Claudius from the oven and open it carefully (always wear oven mitts or heat-resistant gloves and keep your face away from the steam to avoid hurting yourself).
And that’s it! And that’s it! You can now enjoy your perfectly-baked, tender steamed bread with a crunchy base.
*Note: Temperatures and cooking times may vary depending on the oven.